|
In 1999 I started racing the Kingcycle Wasp. This bike, designed by Miles Kingsbury and raced by him and Pat Kinch, features
dual 650C wheels, front wheel drive, the traditional Kingcycle red webbing seat and a steel frame and fork. The bike is very fast - I averaged 28.5mph in my first outing on it, unfaired. After that I generally raced it with a fabric bag stretched over the tailbox and a nose cone - in this configuration I won the 60km road race at the world hpv championships in Ghent in 2000. (see the Bike Photos page) However, fast as the Wasp is, I never found it very comfortable, and it is a bit heavy compared to some modern race bikes. So about 18 months ago I started thinking about designing a new bike as an evolution of the Wasp design. Whilst in Japan I finally had time to start drawing, and starting from the twin 650C wheels (the big wheels really seem to roll well), and front wheel drive (for a shorter chain route and it feels good for powering out of corners), I drew in the rest of the machine. I wanted a slightly more upright position than on the Baron I have been racing the last two years, so set the seat angle at thirty degrees. Then when I started working out the frame shape, it seemed obvious to triangulate the frame by taking it over the shoulder - this enables me to get closer to the front wheel and (hopefully) build a lighter bike. After much playing around, and getting accurate measurements of my limbs taken, I eventually managed to fit everything into a format I was happy with. The seat ended up four and a quarter inches off the deck - theorectically giving sufficient cornering clearance for a 45 degree lean angle. My construction method was already decided: John Kingsbury had started using a 'laser cut and welded' aluminium monocoque technique on the K2 chasis, which seemed very suitable for the flowing lines I wanted to acheive. He had offered to build me a Wasp replacement using this method if I drew it all up, and so I had to work out the patterns I would need to cut from flat sheet to enable the three dimensional frame to be assembled. This took some time, particularly drawing and aligning the many tabs which would hold the frame together for welding, but eventually I ended up with the five pieces required - two sides, the inside (and seat), outside top and outside bottom. The seat is integral to the frame, which should save weight. And there is no adjustment as the bike will be to fit me alone! To check I had the patterns correct, with all the tabs in the right places, and to save any expensive mistakes later, I built a third scale cardboard model of the main frame:  What about the rear wheel? Well, for several reasons (ease of transport, furture proof
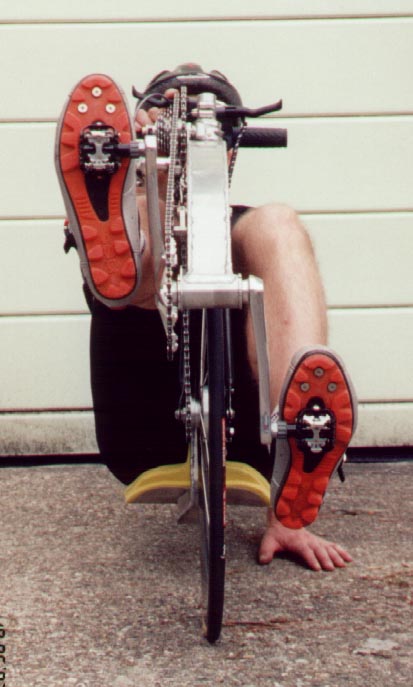
for different rear wheel sizes and possible suspension addition, ease of frame assembly and construction), I decided to utilise a bolt on rear triangle, which would be tubular steel. As for the fork, originally I was planning on using a conventional 650C carbon road fork, but realised I would need a narrower spacing than the usual 100mm. I had designed a custom disc brake FWD hub, but handily John Kingsbury had just made a batch of drum braked FWD hubs with a narrow 67mm spacing, so I was able to use one of those. To go with this I designed an asymmetrical steel fork with aero blades. After a little debate with Miles, we had the patterns cut from 18swg (1.2mm) aluminium sheet, and I started the wrestling match of assembling the frame; this proved somewhat more difficult than anticipated, and certainly harder than the cardboard version! I had to modify some of the tabs, but it eventually all went together as planned. Then it was fingers crossed as it went off to the welders..... A couple of weeks later it came back, looking more like a bike, and a lot less spikey now the tabs had been cut off. Meanwhile, George Reynolds of Reynolds Weld Lab over in New England did a fine job of crafting the fork and rear end for the bike, and I spent some time on the lathe sorting out the intermediate drive parts. John had made some aluminium sprockets and custom bodies for them, so I was able to assemble my own seven speed cassette, 13-25 teeth, with a 30 tooth final drive sprocket. With a bit of playing around of spacer widths, I was able to get the indexing to work using a Campag rear mech and a Sachs gripshift. And finally it was time to put it all together! I hadn't decided on the final handlebar configuration yet. I thought I would probably have bars over my knees with my arms straight, but once I was able to sit on the bike, that seemed too wide. So I made a one-piece aluminium a-head stem/bar that had my hands up behind the intermediate drive, and enabled my elbows to come in front of my chest for better aerodynamics. Forward vision isn't great, but for a racing bike this is something you can get used to - look at Sean Costin's Monkeyhand, somehow he manages to pilot it safely! So on to the pictures. This is the initial assembly to check how everything works - the frame will be anodised and the steel parts nickel plated shortly. 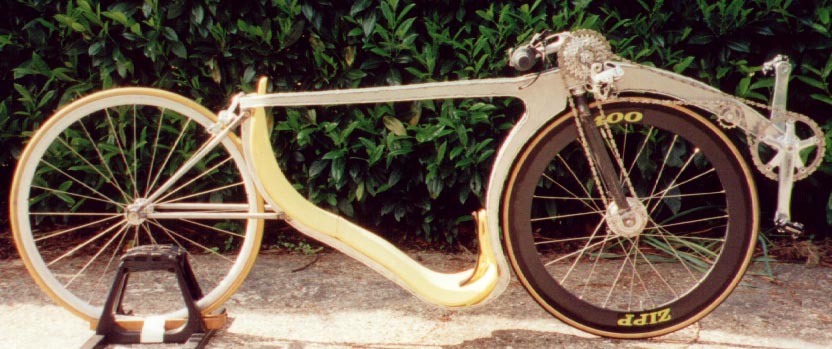

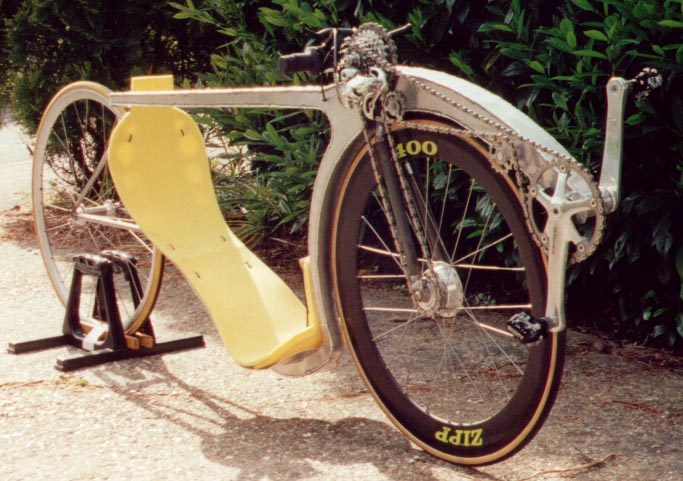

 The seat foam will be cut to match the ventilation holes in the seat for the final assembly. I will also make some
carbon disc covers for the rear wheel, and a carbon chain guard (required for European racing). First ride was pretty good - it fits my leg length perfectly, and there is enough room under the frame to sit up and look forward for a better view when required. The intermediate drive spindle proved to not be strong enough, so I am in the process of making a new part which will support both ends. In the meantime, the frame has been stripped again, and the rather tedious process of cleaning up the welds before anodising has begun. The aim was to build a light bike, so most of the bolts are aluminium, and component wise, aside from the aluminium intermediate drive, there is a Dura-ace crankset (with a single 39 tooth chainring) and bottom bracket, Chorus rear (or front in this case...) derailleur, Sachs Wavy shifter, SRAM 7.0 brake levers and Ultegra rear dual pivot caliper. The front Zipp carbon rim is laced with 24 holes to the custom front hub, the rear hub is a Hope titanium, again 24 spokes to a Mavic CXP10 rim. The bike as pictured weighs a feathery 19.5lbs - once I've added the rear disc covers it should still be under 20lbs; not quite a Razz-Fazz but not bad for an aluminium bike! One problem I found on the first ride was the rear brake cable rattling in a very annoying fashion where it passes through the frame. But I managed to cure this by adding some spaces to the outer cable that pull it tight inside the frame. I thought it would be interesting to compare the position with that of the Baron, so took the following pictures: 
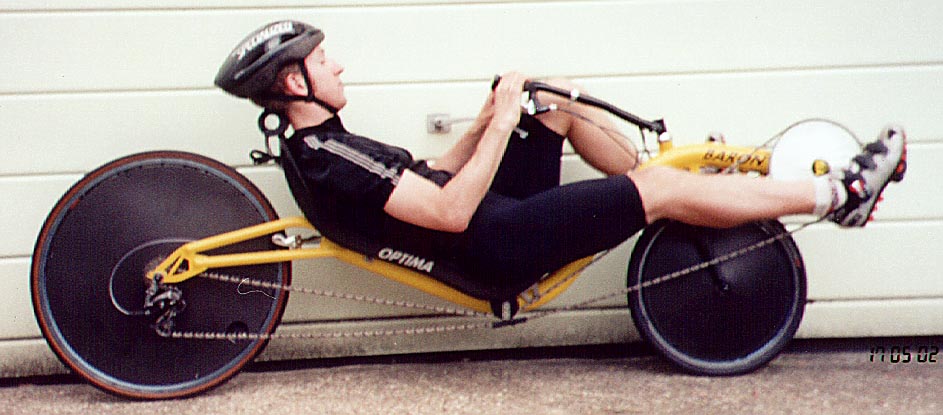

As you can see, the head position is similar, the Hachi is slightly lower, and allows a more comfortable neck position. The more upright position should be good for power, and getting the elbows above the chest makes everything narrower. In theory the bigger wheels should roll better, and the 6lb weight advantage is a nice bonus! We'll see how they match up on the track once the new bike is fully finished. Oh and the name? After much thought (at one point it was to be called 'Teenage Sex' - as in 'fast as.....' but this was considered not suitable for family viewing!), I settled on Hachi, which is Japanese for Wasp, so a nod to the inspiration and where it was designed. Huge thanks to John and Miles Kingsbury, without whose help this project would never have become reality! |